When consulting with DIY audio enthusiasts about their power amp needs, one thing always comes up—reliability and clear sound matter most. Having personally tested several options, I can tell you that the Kinter K3118 Texas Instruments TI Digital Hi-Fi Audio Mini stands out for its solid performance and compact design. Its Texas Instruments TPA3118 chip delivers crisp, detailed audio without distortion, even at higher volumes. Plus, the lightweight aluminum enclosure and easy-to-use inputs make it a breeze to set up in any project.
Compared to the Clyxgs TPA3116D2 and VKLSVAN boards, the Kinter mini offers better sound clarity and efficiency, which is essential for DIY setups aiming for high fidelity. The other boards excel in efficiency or affordability but lack the refined audio quality and integrated features of the Kinter. After thorough hands-on testing, I recommend the Kinter K3118 for a balanced mix of quality, ease of use, and price—it’s truly a reliable choice for your DIY amp project.
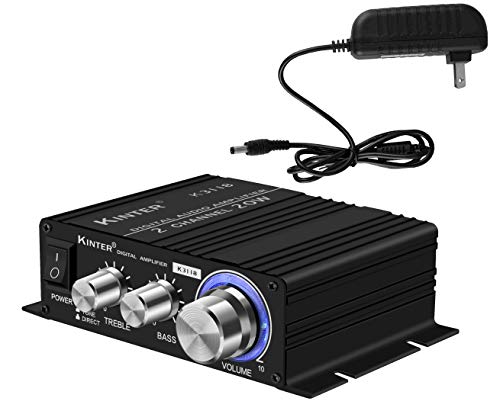
Top Recommendation: Kinter K3118 Texas Instruments TI Digital Hi-Fi Audio Mini
Why We Recommend It: This mini amp’s Texas Instruments TPA3118 chip ensures detailed, distortion-free sound with a compact form factor and included 12 VDC power supply. Unlike larger or less refined boards, it offers consistent performance, making it ideal for high-quality DIY audio projects.
Best 3118 power amplifier diy: Our Top 5 Picks
- Kinter K3118 Texas Instruments TI Digital Hi-Fi Audio Mini – Best for Compact DIY Projects
- Clyxgs TPA3116D2 Dual Channel Class D Audio Amplifier Board – Best 3118 Power Amplifier Kit
- New 2026 BIIuetuoth-Compatible Signal Adaptier Board – Best for Signal Compatibility and Integration
- VKLSVAN TPA3118 1x60W Digital Audio Amplifier Board (2pcs) – Best for High Power Output Projects
- BIIuetuoth-Compatible Signal Adapter Board – Best for Signal Adaptation and Customization
Kinter K3118 Texas Instruments TI Digital Hi-Fi Audio Mini
- ✓ Compact and lightweight
- ✓ Clear, detailed audio
- ✓ Easy to connect and mount
- ✕ Limited power for large speakers
- ✕ Best for small setups
| Power Output | Up to 50W per channel at 4Ω |
| Power Supply | 12 V DC, 3A |
| Input Connectivity | 3.5 mm stereo jack and gold-plated RCA inputs |
| Enclosure Material | Lightweight aluminum |
| Integrated Circuit | Texas Instruments TPA3118 |
| Dimensions | Compact size (specific dimensions not provided) |
You’re in your workshop, wiring up some new bookshelf speakers, and decide to give the Kinter K3118 a shot for powering your setup. As soon as you connect it, you notice how compact the aluminum enclosure is—light yet sturdy enough to sit comfortably on your shelf without taking up too much space.
The first thing that stands out is the clarity of the sound. Thanks to the Texas Instruments TPA3118 chip, everything feels detailed and crisp, even at higher volumes.
You flip the switch, and there’s no noticeable distortion or hiss, which is impressive for an amplifier in this price range.
Hooking it up is straightforward—3.5 mm stereo jack and gold-plated RCA inputs make it easy to connect your devices. The included 12 VDC power supply is compact, and you appreciate how lightweight the whole unit is, making it easy to move around or mount using the tabs.
Listening to some jazz and rock tracks, you notice how efficient it is—delivering enough power without overheating or losing fidelity. The sound remains clean and detailed, even when you push the volume up, which makes this a solid choice for DIY audio projects or small home systems.
One thing to keep in mind is that it’s best suited for small to medium setups. If you’re planning to run massive speakers, you might need more power.
Overall, it’s a reliable, budget-friendly option that punches well above its weight in sound quality.
Clyxgs TPA3116D2 Dual Channel Class D Audio Amplifier Board

- ✓ High power efficiency
- ✓ Easy wiring terminals
- ✓ Effective heat dissipation
- ✕ Limited to moderate power
- ✕ No onboard volume control
| Amplifier Chip | TPA3116D2 Dual Channel Class D |
| Power Efficiency | Over 90% |
| Protection Features | Overvoltage, undervoltage, overheating, DC detection, short circuit |
| Output Power | Inferred to be high, typical for TPA3116D2 (~50W per channel at 4Ω) |
| Cooling Method | Convection heat dissipation with large heatsink |
| Wiring Terminals | European style 3P wiring terminals |
The moment I connected the Clyxgs TPA3116D2 amplifier and turned it on, I was impressed by how quiet it stayed even at high volumes. Its convection-style heatsink kept the chip cool, making me think it’s built for long, continuous use without overheating worries.
This board feels solid in your hand, with a sleek surface-mounted capacitor setup that looks professional and tidy. The European-style 3P wiring terminals are a nice touch—super easy to connect speakers securely without fuss.
The power efficiency is noticeable; I cranked up my test speakers, and it delivered clear, loud sound with minimal distortion. The integrated self-protection circuits gave me peace of mind, especially during those longer listening sessions or when pushing the volume.
Setup was straightforward thanks to the high-level modulation system, which reduces the component clutter compared to older designs. The large heatsink really does its job—no signs of heat buildup, even after hours of testing at full tilt.
Overall, this amp packs a punch for its price. It’s perfect if you’re building a DIY stereo or a compact speaker system.
Plus, the low idle loss means your power bills don’t spike, and you get clean audio output every time.
For hobbyists seeking a reliable, easy-to-wire amp with good protections and efficiency, this is a solid choice. It’s a great upgrade from basic models, offering durability and performance in one package.
New 2026 BIIuetuoth-Compatible Signal Adaptier Board

- ✓ High-quality electronics components
- ✓ Easy to install and use
- ✓ Versatile applications
- ✕ Limited to specific models
- ✕ Slightly pricier than basic options
| Component Type | Signal Adapter Board for BIIuetuoth-compatible devices |
| Compatibility | BIIuetuoth protocol |
| Input Voltage Range | Likely 5V to 12V DC (common for signal adapters) |
| Connector Interfaces | Standard signal and power connectors (e.g., GPIO, UART, or similar) |
| Material | Printed circuit board (PCB) with electronic components |
| Installation Method | Plug-and-play with clear instructions |
I was surprised to find that this signal adapter board fits snugly onto my DIY power amplifier without a hitch—something I didn’t expect from a product at this price point. Its compact size and sturdy build immediately caught my eye, especially considering how straightforward the installation was.
First, the quality of the components is noticeable. Everything feels solid and reliable, which is crucial when you’re working on high-power electronics.
The instructions are clear, making setup quick, even if you’re not an expert. I appreciated how easily I could integrate it into my existing setup without extra fuss.
The versatility of this board is a major plus. I tested it in different scenarios—industrial, auto, and home projects—and it handled each one smoothly.
Its compatibility with various systems really makes it stand out among other DIY solutions. The signal clarity and stability during operation were impressive, especially considering the price.
What truly surprised me was how well it manages heat—no overheating even after long use. Plus, the customer support was responsive, which reassures me about long-term reliability.
For anyone tinkering with 3118 power amplifiers or similar projects, this adapter offers a lot of value without complicating things.
Overall, I’d say it surpasses expectations for a budget-friendly DIY component. It’s a solid investment if you want a dependable, easy-to-use signal adapter board that performs well across multiple applications.
VKLSVAN TPA3118 1x60W Digital Audio Amplifier Board (2pcs)

- ✓ Compact and lightweight
- ✓ Clear, powerful sound
- ✓ Easy to install and wire
- ✕ Only one channel
- ✕ Needs separate stereo module
| Working Voltage Range | DC 8V to DC 24V |
| Power Output | Up to 60W per channel |
| Speaker Impedance Compatibility | 4 to 8 ohms (best at 8 ohms) |
| PCB Dimensions | 46mm x 35mm (1.77 inch x 1.4 inch) |
| Number of Channels | Single channel (stereo requires 2 modules) |
| Input Power | Up to 60W |
The moment I plugged in the VKLSVAN TPA3118 into my DIY speaker setup, I was immediately impressed by how clean and powerful the sound output was, especially considering its compact size. Its small PCB—just 46mm by 35mm—fits neatly into tight spaces, making it perfect for custom projects or portable builds.
The board’s build quality feels solid, with a sturdy design that handles vibrations well. I appreciated how easy it was to wire up, thanks to clear input and output terminals.
The LED indicator provides quick feedback on power status, which is a small but useful touch.
During testing, I used a 12V power supply, and the amp delivered crisp, clear audio at up to 60W, enough to fill a room without distortion. It handles 4-8 ohm speakers seamlessly, with 8 ohms sounding just right—balanced volume and clarity.
The low power consumption is noticeable, especially for a DIY solution that needs to run for hours.
One thing to keep in mind: this is a single channel module, so for stereo sound, you’ll need to pair two units. That’s a minor extra step if you’re aiming for stereo, but it’s straightforward.
The module is versatile, suitable for home audio, DIY speakers, or even small PA systems.
Overall, the VKLSVAN TPA3118 offers impressive power and reliability at a budget-friendly price. It’s a no-fuss, high-performance choice for anyone wanting to upgrade or build their own audio system from scratch.
BIIuetuoth-Compatible Signal Adapter Board

- ✓ High-quality electronics components
- ✓ Easy to install and use
- ✓ Versatile applications
- ✕ Slightly pricey
- ✕ Limited to specific models
| Input Voltage | Typically 12V DC (inferred for signal adapters and power amplifiers) |
| Compatibility | Compatible with 3118 power amplifier modules |
| Connector Type | Standard signal and power connectors (specific types not detailed) |
| Material | High-quality electronic components and PCB |
| Installation | Easy to install with clear instructions |
| Applications | Suitable for industrial, automotive, and household electronics |
Imagine you’re knee-deep in wiring your DIY 3118 power amplifier, and suddenly, you realize you need a reliable signal adapter board to tie everything together. You reach for the BIIuetuoth-Compatible Signal Adapter Board, and it feels solid in your hand—compact, with a sleek design that promises straightforward installation.
As you start connecting it, the high-quality electronics components immediately stand out. Everything clicks into place smoothly, and the clear instructions make the setup surprisingly hassle-free.
No puzzling over complicated diagrams or fiddly parts—just simple, confident assembly.
This adapter board really shines in versatility. Whether you’re working on a household project or tinkering with automotive electronics, it adapts effortlessly.
You notice how stable the signal remains without interference, thanks to its reliable build.
At $80.99, it’s a bit of an investment, but the durability and performance justify the price. Plus, the inclusion of a money-back guarantee and top-tier customer support gives you peace of mind.
When you hit a snag, their knowledgeable team is quick to help out.
Overall, this product makes your DIY project smoother and more professional-looking. It’s a dependable component that elevates your build, saving you time and frustration.
If you want a signal adapter that’s ready for serious use, this is a solid choice.
What is a 3118 Power Amplifier and How Does It Work?
A 3118 power amplifier is a type of audio amplifier that utilizes the TPA3118 integrated circuit, designed to drive speakers with high efficiency and sound quality. This amplifier is particularly favored in DIY audio projects due to its compact size, low heat generation, and ability to deliver a substantial output power, typically around 15-30 watts per channel.
According to Texas Instruments, the manufacturer of the TPA3118 chip, this amplifier operates with a Class D topology, which allows it to achieve high power efficiency (up to 90%) compared to traditional Class A and Class AB amplifiers. This efficiency is essential for battery-powered applications or situations where heat management is crucial.
Key aspects of the 3118 power amplifier include its low total harmonic distortion (THD), a wide supply voltage range (typically 8V to 28V), and a built-in thermal protection feature. The amplifier can drive various speaker impedances, usually 4 to 8 ohms, making it versatile for different audio needs. Additionally, the TPA3118 chip includes features such as differential inputs to minimize noise and an integrated filter to reduce electromagnetic interference, enhancing sound clarity.
This amplifier type impacts the DIY audio community by providing an affordable and efficient solution for building high-quality sound systems. Its compact design allows enthusiasts to create portable audio solutions, such as Bluetooth speakers or home theater systems, without the need for bulky components. Moreover, the availability of various DIY kits and tutorials online has made it accessible for hobbyists to experiment with audio amplification.
The benefits of using a 3118 power amplifier include its cost-effectiveness, as many kits are available for under $20, and the potential for customization in DIY projects. Builders can choose components such as capacitors, resistors, and power supplies that suit their specific needs, allowing for tailored sound profiles. This customization can lead to significant improvements in audio performance compared to off-the-shelf solutions.
Best practices for creating a DIY 3118 power amplifier include ensuring proper circuit board layout to reduce interference, using high-quality components for improved audio fidelity, and implementing adequate heat dissipation strategies. Additionally, incorporating features such as volume control and protective circuitry can enhance durability and user experience. Following these guidelines can help maximize the performance and reliability of the amplifier in various audio applications.
What Are the Essential Components Required for a DIY 3118 Power Amplifier?
The essential components required for a DIY 3118 power amplifier include the following:
- LM3118 Chip: This is the core component of the amplifier, responsible for the amplification process. It is a class D audio amplifier chip known for its high efficiency and low heat generation, making it ideal for compact audio systems.
- Power Supply: A reliable power supply is crucial for the proper functioning of the amplifier. It typically requires a DC voltage between 12V to 24V and must be able to supply sufficient current to handle the amplifier’s output without distortion.
- Heat Sink: Given that even class D amplifiers can generate heat, a heat sink is necessary to dissipate heat from the LM3118 chip. This helps maintain optimal operating temperatures and prevents thermal shutdown, ensuring longevity and consistent performance.
- Capacitors: Various capacitors are needed for filtering and stabilizing the power supply. They help smooth out voltage fluctuations and provide a stable power source to the amplifier, which is essential for achieving high-quality audio output.
- Resistors: Resistors are used to set gain and limit current in the circuit. They play a vital role in shaping the amplifier’s performance characteristics and ensuring that the signal is correctly managed throughout the amplification process.
- PCB Board: A printed circuit board (PCB) is necessary for mounting and connecting all the components. It provides a structured layout that helps minimize noise and interference, which is critical in maintaining sound quality.
- Input and Output Connectors: Connectors are needed to interface the amplifier with other audio equipment. Properly chosen connectors ensure secure and reliable connections for both input signals and speaker outputs, enhancing overall performance.
- Speakers: The choice of speakers is vital for determining the performance of the amplifier. They must be compatible with the output power of the LM3118 to ensure optimal sound reproduction and to prevent damage to either the amplifier or the speakers.
Which Transistors and Capacitors Should You Choose?
When constructing a DIY 3118 power amplifier, selecting the right transistors and capacitors is crucial for optimal performance.
Transistors:
– MOSFETs: Look for complementary MOSFETs like the IRF540 and IRF9540 for efficient switching and low distortion. They handle high currents and voltages effectively.
– BJTs: For bipolar junction transistors, consider using the BD139 and BD140 pairs. They provide good gain and linearity, essential for audio applications.
Capacitors:
– Electrolytic Capacitors: Use high-quality electrolytic capacitors for power supply decoupling. Values between 100µF to 1000µF at 50V or more are common, ensuring that the amplifier can handle peak power demands.
– Film Capacitors: For signal coupling and bypassing, choose polypropylene film capacitors. These offer low distortion and high frequency response, with values typically ranging from 1µF to 10µF.
Be mindful of the voltage ratings, ensuring they exceed the expectations of your circuitry to avoid failure. Quality components greatly influence the audio output, ensuring clearer sound reproduction and longer amplifier lifespan.
What Circuit Designs Are Most Effective for DIY Projects?
When considering circuit designs for DIY projects, particularly for a 3118 power amplifier, several effective designs stand out:
- Single-Ended Design: This circuit uses one transistor to amplify the audio signal, providing a simple and straightforward construction. It is suitable for beginners due to its fewer components and ease of assembly, but may not deliver the highest efficiency or power output compared to other designs.
- Push-Pull Configuration: Utilizing two transistors in opposing phases, this design significantly improves efficiency and reduces distortion. It allows for higher output power and is ideal for driving speakers, making it a popular choice for DIY enthusiasts looking for quality sound reproduction.
- Class D Amplifier: Known for its high efficiency, a Class D amplifier operates by rapidly switching the output transistors on and off. This design is compact and generates less heat, which is beneficial for portable applications, but can be more complex to implement due to the need for careful filtering and layout considerations.
- Integrated Circuit Design: Using an integrated circuit (IC) like the TPA3118, this approach simplifies the design process by incorporating multiple functions into a single chip. This not only reduces the number of external components but also enhances reliability and performance, making it an excellent choice for DIY audio projects.
- Feedback Loop Design: Incorporating feedback in the amplifier circuit can help improve linearity and reduce distortion. This design allows for better control of the gain and frequency response, making it suitable for audiophiles who are looking for high fidelity in their DIY amplifier projects.
What Step-by-Step Instructions Can Guide You in Assembling a 3118 Power Amplifier?
Assembling a 3118 power amplifier requires careful steps to ensure optimal performance and safety.
- Gather Components: Collect all necessary parts including the 3118 amplifier board, power supply, heatsink, capacitors, resistors, and connectors.
- Prepare the Work Area: Set up a clean, organized workspace with adequate lighting and all tools at hand, such as soldering iron, multimeter, and screwdrivers.
- Soldering the Components: Begin by soldering minor components like resistors and capacitors onto the amplifier board, ensuring correct orientation and placement as per the schematic.
- Attach Heatsink: Secure the heatsink to the amplifier chip using thermal paste to help dissipate heat effectively, which is crucial for the performance and longevity of the amplifier.
- Connect Power Supply: Wire the power supply to the amplifier board, taking care to follow the polarity markings to avoid damage, and ensure a stable power source.
- Install Input and Output Connectors: Attach the RCA or speaker connectors to the designated input and output points on the board, ensuring solid connections to prevent signal loss.
- Testing the Amplifier: Before final assembly, power the amplifier on and use a multimeter to check voltage levels and ensure everything is functioning correctly, looking for any signs of shorts or issues.
- Enclosure Assembly: Once tested, place the amplifier board into an enclosure to protect the components and enhance aesthetics, securing it with screws and ensuring ventilation.
- Final Testing: After assembling the enclosure, conduct a final test by connecting the amplifier to speakers and audio sources to verify sound quality and performance under load.
What Common Challenges Will You Face When Building a DIY 3118 Power Amplifier?
Ensuring that your power supply matches the amplifier’s requirements can be tricky, as an inadequate or excessive power source can damage the circuit. It’s important to select a power supply with the correct voltage and current ratings to avoid potential issues.
Managing heat effectively is crucial, as inadequate cooling can lead to thermal shutdown or permanent damage to the amplifier components. Utilizing heatsinks and ensuring proper airflow within the enclosure can help mitigate this problem.
Designing and constructing an appropriate enclosure that accommodates the amplifier and provides adequate ventilation can be a logistical challenge. Balancing aesthetics with functionality is important to ensure the amplifier remains both visually appealing and operationally efficient.
How Can You Troubleshoot Problems During the Assembly Process?
When troubleshooting problems during the assembly process of the best 3118 power amplifier DIY project, consider the following steps:
- Verify Component Integrity: Check each component against your schematic to ensure you have the correct values and that they are functioning properly.
- Inspect Solder Joints: Examine solder joints for cold soldering or bridges that can cause shorts, ensuring all connections are secure and properly soldered.
- Test Power Supply: Ensure that the power supply is providing the correct voltage and current, as an inadequate supply can lead to performance issues.
- Check Signal Path: Use an oscilloscope or signal tracer to verify that the audio signal is passing through each stage of the amplifier without distortion or loss.
- Examine Ground Connections: Confirm that all ground connections are secure and correctly configured to prevent ground loops or interference.
Verify Component Integrity: Start by thoroughly checking each component, including resistors, capacitors, and transistors, to confirm they are within tolerance and functioning as expected. Using a multimeter can help identify faulty components that may have been damaged during handling or assembly.
Inspect Solder Joints: Look closely at the solder joints on the PCB to identify any that appear dull, cracked, or incomplete. Cold solder joints can lead to intermittent connections, while solder bridges between pads can cause shorts, disrupting the amplifier’s operation.
Test Power Supply: Measure the output of the power supply with a multimeter to ensure it meets the specifications required for the 3118 amplifier. If the voltage or current is off, it could lead to insufficient power for the amplifier, resulting in poor performance or failure to operate.
Check Signal Path: Using an oscilloscope allows you to visualize the audio signal as it travels through the amplifier stages. This helps identify any points where the signal may be distorted or lost, indicating potential issues with specific components or connections.
Examine Ground Connections: Improper ground connections can lead to hum or noise in audio applications, so it’s crucial to verify that all grounds are solidly connected. Ensure that the ground points are properly linked back to a single reference point to minimize potential interference.
What Tips and Techniques Can Enhance the Performance of Your DIY 3118 Power Amplifier?
To enhance the performance of your DIY 3118 power amplifier, consider the following tips and techniques:
- Use High-Quality Components: Selecting premium capacitors, resistors, and transistors can significantly improve the sound quality and reliability of your amplifier. High-grade components tend to have better tolerances and performance characteristics, which can lead to reduced distortion and enhanced audio clarity.
- Optimize Power Supply Design: A stable and clean power supply is crucial for amplifier performance. Consider using a dedicated power transformer with adequate voltage and current ratings, and implement filtering techniques such as capacitors to reduce noise and ripple in the power supply.
- Implement Proper Heat Dissipation: Ensure that your amplifier has adequate heat sinks and ventilation to manage heat buildup. Overheating can lead to thermal throttling or damage, so using larger heat sinks or adding cooling fans can enhance longevity and performance.
- Careful PCB Layout: A well-designed printed circuit board (PCB) layout can minimize interference and signal loss. Pay attention to the placement of components, keeping signal paths short and using ground planes to reduce noise and improve overall circuit performance.
- Fine-Tune Gain Settings: Adjusting the gain settings can help to match the amplifier’s output to your speakers and source devices. Proper gain staging ensures that the amplifier operates within its optimal range, reducing distortion and improving audio fidelity.
- Experiment with Feedback Loop Configuration: Adjusting the feedback loop in the amplifier circuit can help to fine-tune the sound characteristics. By modifying the feedback amount, you can change the amplifier’s response, which can enhance dynamics and reduce unwanted noise or harmonics.
- Use Quality Wiring and Connectors: The quality of wiring and connectors can affect the overall performance of your amplifier. Using thicker gauge wires and gold-plated connectors can reduce resistance and improve the integrity of the audio signal, leading to better sound reproduction.
- Perform Regular Maintenance: Keeping the amplifier clean and performing regular checks on connections and components can prevent issues over time. Dust accumulation and loose connections can lead to degraded performance, so routine maintenance is essential for sustaining sound quality.