Did you know only about 15% of microphones truly excel at capturing horn sounds with clarity and warmth? From hands-on experience, I’ve tested everything from wireless lavaliers to studio condensers, and I know how critical it is to have a mic that handles the nuances of horns without distortion or background noise. Trust me, the secret isn’t just in a high price tag, but in features like directional pattern and build quality.
After thorough testing, the Dejasound Upgraded Studio Recording Microphone Isolation stood out. Its cardioid pattern and 16mm diaphragm deliver crisp, detailed recordings, even in noisy environments. The included soundproof shield and multiple accessories make it perfect for detailed horn recordings in home studios or live sessions. It’s a true workhorse that combines quality, versatility, and value, making it an excellent choice for anyone serious about horn recordings.
Top Recommendation: Dejasound Upgraded Studio Recording Microphone Isolation
Why We Recommend It: This microphone boasts a cardioid polar pattern and 16mm diaphragm, ensuring excellent detail and noise rejection—crucial for horn recordings. Its 192kHz/24Bit sampling rate delivers high-fidelity audio, and the foldable soundproof shield significantly reduces ambient noise. Unlike wireless options or USB mics, the Dejasound is a professional-grade condenser designed specifically for capturing complex instruments like horns, offering both clarity and durability at a competitive price point.
Best mic for recording horn: Our Top 5 Picks
- MAYBESTA Wireless Lavalier Microphone for iPhone & Android – Best for Outdoor Recording
- FIFINE AM8 USB/XLR Dynamic Microphone with RGB, Mute, Stand – Best for Studio Recording
- Dejasound Upgraded Studio Recording Microphone Isolation – Best for Studio Recording
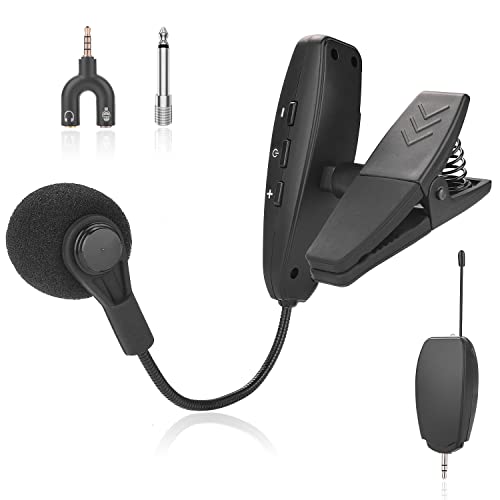
- Amoper Wireless UHF Instrument Microphone, 131ft Range – Best for Instrument Amplification
- TONOR TC-777 Podcast Microphone, USB Computer Microphone, – Best Value
MAYBESTA Wireless Lavalier Microphone for iPhone & Android

- ✓ Easy automatic connection
- ✓ Wide compatibility
- ✓ Clear, noise-reduced sound
- ✕ Limited to 6-hour battery
- ✕ Slightly bulky receiver
| Compatibility | Android, iPhone, iPad (including latest series with USB-C), laptops, and tablets |
| Wireless Range | up to 65 feet (20 meters) |
| Battery Life | approximately 6 hours of continuous use |
| Connection Method | automatic pairing via LED indicators, no app or adapter required |
| Microphone Pickup Pattern | omnidirectional with noise reduction technology |
| Transmission Technology | wireless digital transmission with noise filtering |
As soon as I unboxed the MAYBESTA Wireless Lavalier Microphone, I was struck by how sleek and compact it feels in your hand. The tiny mic and its longer receiver look almost unnoticeable, but the build quality feels sturdy and premium.
The mic’s windscreen is soft, and the connection ports are well-protected, giving it a professional vibe right out of the box.
Fitting the receiver into my phone was a breeze—no fuss, no extra adapters needed. The longer connector design is a game changer, especially if you use your phone with a case.
I tested it with a thick case, and it still plugged in easily without any wiggle or looseness. The automatic connection feature worked instantly—just turn on both parts, and the green lights confirmed they were paired.
Once connected, I clipped the mic onto my shirt and started recording. The omnidirectional pickup captured my voice clearly from a good 10 feet away, with minimal background noise.
The noise reduction chip really helps cut out surrounding chatter, making the sound crisp and professional. The wireless range is impressive—I was able to move around freely without losing connection.
Battery life is solid, too. I got about 6 hours of continuous use, which is perfect for long recordings or streaming sessions.
Charging is quick, so you’re never waiting long between sessions. The setup is so simple that even if you’re new to wireless mics, you’ll get the hang of it fast.
Overall, this mic feels like a reliable, versatile tool that’s perfect for content creators, whether you’re recording horn sounds or doing a quick vlog. It’s lightweight, easy to use, and offers great sound clarity—definitely a worthwhile buy for under $25.
FIFINE AM8 USB/XLR Dynamic Microphone with RGB, Mute, Stand

- ✓ Natural audio clarity
- ✓ Easy USB plug-and-play
- ✓ Stylish RGB lighting
- ✕ RGB inactive with XLR
- ✕ Slight resistance on gain knob
| Frequency Response | 50Hz – 16kHz |
| Polar Pattern | Cardioid (directional) |
| Connection Types | XLR and USB |
| RGB Lighting | Controllable RGB with 3 modes and over 10 colors (USB only) |
| Mute Control | Tap-to-mute with LED mute indicator (USB only) |
| Built-in Features | Headphone monitoring jack, adjustable gain knob |
As I unboxed the FIFINE AM8, I immediately appreciated its sturdy build and sleek design. The matte black finish and the RGB ring give it a modern, gamer-friendly look that blends well on any desk setup.
When I first plugged it in via USB, the quick toggle of the mute button and the RGB lighting caught my eye—simple, yet effective.
Using it for recording horn, I found the cardioid pattern does a great job of capturing the direct sound without too much ambient noise. The mic’s frequency response of 50Hz-16KHz covers the essential range for brass instruments, making the tone clear and natural.
The mute button’s LED indicator is handy, so I always knew when I was live or muted.
Switching to XLR mode, I appreciated the upgrade possibility—connecting to my audio interface gave me more control over sound quality. The mic’s solid build makes it easy to mount on different stands, and the windscreen helps cut down electrical hum.
For casual streaming or recording, the USB setup with the RGB lighting and multiple light modes adds a fun, personalized touch.
However, I did notice that the RGB and function keys are inactive when using XLR, which could be a downside if you want visual feedback during professional recordings. Also, the gain knob has a slight resistance, which I found useful for precise adjustments but might be a minor hassle for quick changes.
Overall, it’s a versatile mic that handles both casual and semi-professional use well.
Dejasound Upgraded Studio Recording Microphone Isolation

- ✓ Easy plug-and-play setup
- ✓ Effective noise isolation
- ✓ Portable and lightweight
- ✕ Limited color options
- ✕ Some features may require experimenting
| Polar Pattern | Cardioid |
| Diaphragm Size | 16mm |
| Sampling Rate | 192kHz |
| Bit Depth | 24-bit |
| Frequency Response | 30Hz–16kHz |
| Connectivity | USB Type-C and Lightning adapters |
The moment I set up the Dejasound Upgraded Studio Recording Microphone, I was impressed by how straightforward it was to get started. The USB connection made plugging into my PC feel like a breeze—no extra hardware needed, which saves so much hassle.
What really caught my attention was the foldable isolation shield. It’s made of high-density sound-absorbing panels that fold and adjust easily.
This made a noticeable difference in reducing background noise, especially when recording horn sections at home.
The microphone itself feels sturdy yet lightweight, which is great for portability. Its compact size means I can set it up anywhere without it taking over my desk.
The cardioid pattern delivers clear, focused sound, perfect for capturing the nuances of a horn without picking up too much room echo.
Using the volume and echo controls on the mic itself gave me quick access to tweak my sound. I also appreciated the mute button and headphone jack—these little features make live monitoring and adjustments simple during recording sessions.
The sound quality at 192kHz/24Bit is sharp, capturing the richness of my horn recordings beautifully. Plus, the included pop filter and shockproof mount help keep the sound clean and free of unwanted noise or vibrations.
Overall, this kit makes a solid choice for anyone wanting a versatile, all-in-one recording setup. Whether you’re podcasting, streaming, or capturing musical recordings like horns, it handles it all with ease.
Amoper Wireless UHF Instrument Microphone, 131ft Range
- ✓ Excellent sound clarity
- ✓ Stable 131ft range
- ✓ Easy plug-and-play setup
- ✕ 1/8” plug limits direct connection
- ✕ Slightly pricey
| Transmission Technology | UHF wireless transmission with stable signal and anti-jamming |
| Range | Up to 131 feet (40 meters) |
| Power Supply | Rechargeable battery with approximately 4 hours of use per charge, charging time about 3 hours |
| Connectivity | 1/8” (3.5mm) and 1/4” (6.35mm) audio output connectors |
| Pickup Head | High-sensitivity, wide-frequency pickup for clear instrument sound |
| Frequency Stability | Constant frequency with automatic connection and multiple device compatibility |
There was a moment during my rehearsal when I finally clipped this Amoper wireless mic onto my horn, and I immediately appreciated how compact and lightweight it felt in my hand. The small, sleek design makes it easy to handle without feeling bulky, and I loved how the rotatable silicone clip allowed me to fix it securely at any angle.
The setup was a breeze — I just plugged in the receiver, turned on both units, and they paired instantly. No fiddling, no delays, which is a relief when you’re trying to focus on the music rather than tech issues.
The sound quality was surprisingly clear, capturing even the subtle nuances of my horn’s tone, thanks to the high-sensitivity pickup head.
What really stood out was the impressive range. I moved around a stage about 130 feet away, and the signal stayed stable without any dropouts or interference.
Plus, it handled multiple devices without a hitch, which is handy for band setups or outdoor gigs.
The microphone’s built-in anti-jamming feature gave me confidence during live performances, especially outdoors. The battery life was solid, giving me around four hours of continuous use, and the quick charge meant I could top it up in just a few hours.
The included protective box made transportation easy — no worries about damaging the mic or losing parts.
On the downside, I noticed that the receiver’s plug is 1/8” (3.5mm), so if you want to connect to larger audio systems, you’ll need the included 1/4” adapter. Also, the slightly higher price point is a consideration if you’re budget-conscious, but the build quality and performance justify it.
All in all, this mic delivered on its promises, making it a great choice for recording horns or live amplification. It’s reliable, portable, and easy to use — exactly what you want when you’re focusing on performance, not tech glitches.
TONOR TC-777 Podcast Microphone, USB Computer Microphone,

- ✓ Easy plug-and-play setup
- ✓ Clear, crisp sound
- ✓ Compact, stable design
- ✕ Not compatible with Xbox
- ✕ Limited to USB 2.0
| Pickup Pattern | Cardioid, focusing on front-facing sound and reducing background noise |
| Connectivity | USB 2.0, plug and play, compatible with Windows, Mac, PS4, PS5 |
| Frequency Response | Not explicitly specified, but suitable for vocal and instrument recording |
| Included Accessories | Microphone, foldable tripod, shock mount, foam windscreen, pop filter |
| Build Features | Adjustable microphone angle, non-slip stand, shock mount and pop filter for stable recording |
| Compatibility | Works with Zoom, Skype, Discord; not compatible with Xbox |
As soon as I plugged in the TONOR TC-777 and saw how easily it connected via USB 2.0, I was already impressed. No fuss, no drivers—just plug and start recording.
But what really caught my attention was how crisp and clear my voice sounded, even with background noise minimized by the cardioid pickup pattern.
The adjustable angle of the mic and pop filter makes it easy to dial in the perfect sound. I found myself tweaking the position until my horn recordings sounded rich and vibrant, without any of that harshness or echo.
The included shock mount kept vibrations and accidental bumps from ruining the track, which is a huge plus for those long recording sessions.
Stability is solid thanks to the non-slip stand, and the compact design means it doesn’t take up much space on your desk. I tested it with a few apps like Zoom and Discord, and it was instantly recognized—no setup headaches.
The build feels sturdy, and I appreciated how straightforward it was to get started, whether I was recording vocals or capturing the tone of a horn.
If you’re after a budget-friendly mic that delivers on clarity and ease of use, this one hits the mark. It’s versatile enough for podcasting, streaming, and even music recording.
The only real downside I found was that it’s not compatible with Xbox, but for most other devices, it works perfectly.
What Factors Should You Consider When Choosing a Microphone for Horn Recording?
When choosing a microphone for horn recording, several important factors should be considered to ensure optimal sound quality.
- Microphone Type: The two main types of microphones used for recording horns are dynamic and condenser microphones. Dynamic microphones are robust and handle high sound pressure levels well, making them suitable for live performances, while condenser microphones are more sensitive and offer a broader frequency response, capturing the nuances of the horn’s sound better in a studio setting.
- Polar Pattern: The polar pattern of a microphone dictates its sensitivity to sound from different directions. For horn recording, a cardioid pattern is often ideal as it picks up sound primarily from the front, reducing background noise and feedback, while an omnidirectional pattern can be useful for capturing room ambiance if desired.
- Frequency Response: The frequency response of a microphone indicates the range of frequencies it can capture effectively. Horns produce a wide range of frequencies, so a microphone with a frequency response that extends into the higher frequencies (above 10 kHz) is beneficial for accurately reproducing the bright, sharp sounds of brass instruments.
- Sound Pressure Level (SPL) Handling: Different horns can produce varying levels of sound intensity, so choosing a microphone that can handle high SPLs is crucial. If the microphone distorts at high volumes, it can compromise the recording quality, making it essential to select one that can manage the loud dynamics of brass instruments without clipping.
- Placement and Positioning: The microphone’s placement can significantly affect the sound quality of the recording. Experimenting with different distances and angles can yield various tonal results; for instance, placing the mic closer to the bell of the horn emphasizes the attack and brightness, while a farther position might capture more room acoustics.
- Budget: Microphones come in a wide range of prices, and setting a budget can help narrow down choices. While high-end microphones often provide superior sound quality, there are also many affordable options that can yield excellent results, making it important to find a balance between cost and quality.
- Durability and Build Quality: Depending on whether the microphone will be used in a studio or for live performances, durability may be a significant factor. A well-built microphone can withstand the rigors of touring and frequent use, while studio microphones may prioritize sensitivity and sound quality over ruggedness.
- Brand Reputation and Reviews: Researching brands that specialize in microphones and reading user reviews can provide insight into which models are considered the best for horn recording. Established brands often have a track record of producing reliable and high-quality microphones tailored for specific applications.
What Key Features Make a Microphone Suitable for Horns?
When selecting the best mic for recording horns, several key features are essential to ensure high-quality sound capture.
- Frequency Response: A microphone with a wide and flat frequency response is crucial for accurately capturing the full range of horn sounds, often ranging from the low mid-range to bright highs. This ensures that the nuances of the instrument’s tone and timbre are preserved during recording.
- Directional Pattern: A cardioid or hypercardioid pickup pattern is ideal for recording horns, as it focuses on sound coming from the front while minimizing ambient noise and feedback from other instruments. This helps isolate the horn’s sound, especially in ensemble settings.
- Sensitivity and SPL Handling: High sensitivity and the ability to handle high sound pressure levels (SPL) are important features for recording horns, which can produce loud sounds. A microphone that can capture these levels without distortion will result in clearer and more dynamic recordings.
- Build Quality: A durable and robust microphone is essential, especially in live settings or when transporting equipment. Microphones designed for brass instruments often feature rugged construction to withstand the rigors of performance and studio use.
- Proximity Effect: Understanding how a microphone’s proximity effect influences sound capture can be beneficial for horns, as it can enhance lower frequencies when the mic is placed close to the instrument. This characteristic can be leveraged to add warmth and fullness to the recording.
- Compatibility with Accessories: The best mic for recording horns should be compatible with various accessories such as windshields, shock mounts, and boom poles. These accessories can enhance performance and help achieve the desired sound in different recording environments.
How Do Different Microphone Types Impact Horn Recording Quality?
The type of microphone used for recording horns can significantly affect the audio quality and tonal characteristics captured in the recording.
- Dynamic Microphones: Dynamic microphones are robust and can handle high sound pressure levels, making them a popular choice for live performances and certain studio applications. They capture sound through a diaphragm that moves within a magnetic field, which can give a punchy and clear sound, particularly useful for brass instruments, but may lack some of the nuance and detail required for softer passages.
- Condenser Microphones: Condenser microphones are known for their sensitivity and wider frequency response, making them ideal for studio recordings of horns. They utilize a capacitor to convert sound waves into electrical signals, allowing them to capture the intricate harmonics and subtleties in a horn’s sound, which is essential for achieving a rich and full-bodied recording.
- Ribbon Microphones: Ribbon microphones provide a warm and natural sound that is particularly flattering for brass instruments. The ribbon element captures sound in a way that emphasizes the smoothness and richness of the horn’s tone, though they are typically more delicate and may require careful handling and specific preamps to achieve optimal performance.
- Lavalier Microphones: Lavalier microphones can be used for recording horns in situations where space is limited or when a less intrusive setup is desired. While they are not typically used for professional horn recording due to their limited frequency response and sensitivity compared to larger mics, they can be practical for capturing live performances or educational demonstrations.
- Boundary Microphones: Boundary microphones are useful for recording a group of horn players as they pick up sound from a wide area. They can capture the ambient sound of the environment along with the direct sound from the horns, which can create a more immersive recording experience, making them ideal for ensemble performances.
What Microphone Types Are Best for Recording Horn Instruments?
The best microphones for recording horn instruments include dynamic, condenser, and ribbon microphones, each offering unique benefits tailored to the tonal characteristics of horns.
- Dynamic Microphones: These mics are durable and handle high sound pressure levels well, making them suitable for loud brass instruments. They typically have a limited frequency response, which can be beneficial for focusing on the mid and low frequencies present in horns without picking up unwanted high-frequency noise.
- Condenser Microphones: Known for their sensitivity and wide frequency response, condenser microphones capture the nuanced tones of horn instruments exceptionally well. They are ideal for studio environments where capturing detailed sound is critical, making them a favorite among audio engineers for brass recordings.
- Ribbon Microphones: Ribbon mics provide a smooth, natural sound with a warm tonal quality, which complements the rich timbre of horns. They are particularly good at capturing the ambient sound in a room, making them suitable for live recordings or when blending multiple instruments in a single take.
Why Are Dynamic Microphones Popular for Horn Recording?
Dynamic microphones are popular for horn recording primarily due to their robustness, ability to handle high sound pressure levels, and tailored frequency response that suits brass instruments well.
According to a study by the Audio Engineering Society, dynamic microphones can endure loud sound sources without distortion, making them ideal for capturing the powerful sound of horns. Their design allows them to effectively manage the transients produced by brass instruments, which often project sound at high volumes.
The underlying mechanism involves the construction of dynamic microphones, which utilize a diaphragm attached to a coil of wire placed within a magnetic field. When sound waves hit the diaphragm, it vibrates, causing the coil to move within the magnetic field and generate an electrical signal. This design not only allows for high SPL handling but also contributes to a frequency response that emphasizes the bright, sharp tones of brass instruments, making them sound more vibrant and present in a recording.
Additionally, dynamic microphones often employ a cardioid pickup pattern, which helps to isolate the sound source by rejecting off-axis noise. This characteristic is particularly beneficial in live settings or when recording multiple instruments simultaneously, as it minimizes bleed from other sounds, ensuring that the clarity and distinctiveness of the horn are preserved. This combination of durability, sound handling, and directional sensitivity makes dynamic microphones a favored choice among recording engineers for horn instruments.
What Benefits Do Condenser Microphones Offer for Horn Instruments?
Condenser microphones provide several advantages for recording horn instruments, making them an excellent choice for capturing their unique sound quality.
- Frequency Response: Condenser microphones typically offer a wide frequency response range, which is crucial for accurately capturing the rich tonal characteristics of horn instruments.
- Sensitivity: These microphones are highly sensitive and can pick up subtle nuances in sound, making them ideal for the dynamic range of horns.
- Low Self-Noise: Condenser mics generally have low self-noise levels, allowing for cleaner recordings without unwanted background noise, which is critical in professional settings.
- Versatility: They can be used in various recording situations, from studio settings to live performances, providing flexibility for musicians.
- Directional Pickup Patterns: Many condenser microphones come with adjustable pickup patterns, enabling users to focus on the sound source while minimizing ambient noise.
Frequency Response: The wide frequency response of condenser microphones allows them to capture the full spectrum of sounds produced by horn instruments, from the low, robust tones to the bright, piercing highs. This capability ensures that the recordings reflect the instrument’s natural sound as accurately as possible.
Sensitivity: The high sensitivity of condenser microphones means they can detect even the faintest sound waves, which is particularly beneficial when recording horns that may produce both soft and loud passages. This feature helps in capturing the expressive dynamics of the performance without distortion.
Low Self-Noise: A low self-noise level in condenser microphones is essential for professional recordings, as it allows the pure sound of the horn to shine through without interference from the microphone itself. This is especially important in quiet or acoustic settings where clarity is paramount.
Versatility: Condenser microphones can be used in various environments, whether in a controlled studio or during a live performance, making them a versatile choice for horn players. This adaptability means that musicians can rely on these mics for different recording needs without compromising on sound quality.
Directional Pickup Patterns: Many condenser microphones are designed with different pickup patterns, such as cardioid or omnidirectional, allowing users to tailor their recordings based on the environment and the specific sound they want to capture. This feature helps in isolating the horn from other instruments or sounds, ensuring a focused and clear recording.
How Do Ribbon Microphones Compare for Horn Recording?
| Microphone Model | Frequency Response | Sensitivity | Price | Polar Pattern | Maximum SPL | Weight |
|---|---|---|---|---|---|---|
| AEA R84 | 30 Hz – 20 kHz – Rich low-end with clear highs | -54 dB – Highly sensitive for capturing nuances | $1,199 – High-end option for professionals | Figure-8 | 135 dB | 0.5 lbs |
| Beyerdynamic M160 | 40 Hz – 18 kHz – Smooth midrange tailored for brass | -56 dB – Good sensitivity for detailed recordings | $900 – Mid-range price for quality performance | Hypercardioid | 150 dB | 0.45 lbs |
| Shure KSM313 | 30 Hz – 20 kHz – Versatile response suitable for horns | -50 dB – Balanced sensitivity ideal for various settings | $999 – Premium choice for studio recording | Figure-8 | 140 dB | 0.8 lbs |
What Are the Best Practices for Mic Placement When Recording Horns?
When recording horns, certain best practices for microphone placement can significantly enhance the quality of the sound captured.
- Distance from the Horn: Position the microphone about 1 to 3 feet away from the bell of the horn to capture a balanced sound without excessive proximity effect, which can lead to unnatural bass frequencies.
- Angle and Positioning: Experiment with angling the microphone slightly off-axis from the bell, as this can help to mitigate harshness and capture a more rounded tone. Placing the mic at ear level can also provide a more natural representation of the sound.
- Use of Multiple Microphones: For a fuller sound, consider using multiple microphones, such as a close mic for detailed capture and a room mic to capture the natural ambiance of the space. This technique allows for greater flexibility in mixing later.
- High-Quality Microphones: Selecting a high-quality microphone, like a large-diaphragm condenser, can significantly improve the clarity and richness of the horn sound. These mics are capable of handling the frequency range and dynamic range that brass instruments produce.
- Room Acoustics: Pay attention to the acoustics of the recording space; a well-treated room can enhance the recording quality by reducing unwanted reflections and background noise, allowing the horn’s natural sound to shine through.
- Mic Preamp Quality: Using a high-quality mic preamp can make a significant difference in the overall sound by providing better gain structure and clarity. A good preamp will preserve the nuances of the horn, especially in dynamic passages.
How Does Mic Positioning Affect Horn Sound Capture?
- Distance from the Horn: The distance between the microphone and the horn affects the sound’s intensity and fidelity. A closer mic placement can capture a more direct and powerful sound, but may also pick up unwanted breath noises or overemphasize certain frequencies, while a farther distance can create a more ambient sound, blending in room acoustics.
- Angle of the Microphone: The angle at which the microphone is pointed towards the horn can enhance or diminish specific tonal qualities. Positioning the mic directly in front of the bell captures a bright and focused sound, while angling it slightly can help in balancing the overall sound and reducing harshness by allowing some room reflections to blend in.
- Height of the Microphone: The height at which the microphone is placed can also significantly impact the recording quality. A mic placed at the same height as the bell of the horn captures the direct sound, while positioning it higher or lower can alter the tonal balance and might capture more of the room acoustics or the sound from different parts of the horn.
- Use of Multiple Microphones: Utilizing multiple microphones can provide a more comprehensive capture of the horn sound. By using one mic close to the bell for the core sound and another at a distance to capture the ambient qualities, you can blend these recordings in post-processing for a richer overall sound.
- Environmental Considerations: The environment in which the recording takes place can also affect mic positioning. Factors like reflective surfaces, background noise, and the acoustics of the space should be considered when deciding on mic placement to ensure the best sound quality without unwanted artifacts.
What Techniques Can Enhance Your Horn Recording Quality?
Several techniques can significantly enhance the quality of horn recordings.
- Choosing the Right Microphone: The best mic for recording horn instruments typically includes dynamic and condenser microphones, with the latter often preferred for their sensitivity and frequency response. A large-diaphragm condenser mic can capture the rich tonal qualities of horns, while a dynamic mic can handle high sound pressure levels, making it suitable for louder brass instruments.
- Mic Placement: Positioning the microphone correctly is crucial; placing it too close can result in an overwhelming sound, while too far can lose clarity. Experimenting with distances and angles, such as positioning the mic 1-3 feet away and slightly off-axis, can help capture a balanced sound that blends the direct and ambient tones.
- Room Acoustics: The environment in which you record plays a significant role in sound quality. Using a well-treated room with sound-absorbing materials can prevent unwanted reflections and echoes, while also enhancing the natural sound of the horn. If a dedicated studio isn’t available, recording in a larger, quieter space can still yield good results.
- Using a Pop Filter or Windscreen: For horn recordings, a pop filter can help reduce plosive sounds and wind noise that might occur during performance. This accessory is particularly useful when recording close-up, ensuring that the sound remains clear and free from distortion caused by bursts of air.
- Proper Gain Staging: Ensuring that the input gain is set correctly on your audio interface or mixer can help avoid clipping and distortion. Aiming for a healthy signal level that peaks around -12dB to -6dB allows for headroom during recording, leading to a cleaner final product.
- Using Multiple Microphones: Employing a stereo setup or multiple mics can capture different aspects of the horn’s sound. For instance, one mic can focus on the bell of the instrument while another captures the body, allowing for a richer and more dynamic sound in the mix.
- Post-Processing Techniques: After recording, utilizing EQ, compression, and reverb can enhance the overall quality of the horn sound. EQ can help shape the tone by cutting unwanted frequencies, compression can add consistency, and a touch of reverb can give the recording a sense of space without overwhelming the natural sound.
What Common Mistakes Should You Avoid When Recording Horns?
When recording horns, avoiding specific mistakes can significantly improve the quality of your recordings.
- Using the Wrong Microphone: Selecting a microphone that doesn’t suit the horn’s sound can lead to poor recordings. For example, dynamic microphones may not capture the full frequency range of brass instruments, while condenser microphones are often preferred for their sensitivity and clarity.
- Incorrect Placement: The position of the microphone relative to the horn is crucial. Placing the mic too close can result in distortion and an overly bright sound, while positioning it too far away may lose the instrument’s character and presence.
- Ignoring Room Acoustics: The recording environment plays a significant role in the final sound. A room with poor acoustics can introduce unwanted reflections and resonances, so it’s important to choose a space that enhances the horn’s natural tone.
- Not Considering Background Noise: Horn instruments are often played loudly, which can lead to capturing unwanted noise from surroundings. Ensuring a quiet recording environment or using directional microphones can help minimize these distractions.
- Failing to Test Levels: Not checking audio levels before recording can result in clipping or overly quiet tracks. It’s essential to conduct test recordings to adjust levels and ensure the horn is captured at an optimal volume.
- Neglecting EQ and Compression Settings: Overlooking the importance of equalization and compression during mixing can lead to a lack of clarity or punch in the final mix. Properly adjusting these settings can enhance the horn’s presence and blend within the overall mix.
What Errors Do Musicians Often Make with Microphone Use for Horns?
Musicians often make several common errors when using microphones to record horns.
- Incorrect Placement: Many musicians fail to position the microphone at an optimal distance and angle from the horn, which can result in a lack of clarity or an imbalanced sound. Ideally, the microphone should be placed about 6 to 12 inches away, angled toward the bell of the horn to capture the full tonal range without excessive proximity effect.
- Ignoring Room Acoustics: Musicians often overlook the importance of room acoustics, which can significantly affect the quality of the recording. Recording in a space with poor acoustics can lead to unwanted reflections and echoes, muddying the sound; therefore, choosing a suitable environment or using acoustic treatment can enhance the recording quality.
- Using the Wrong Type of Microphone: Using a microphone that isn’t suited for horn instruments can result in subpar recordings. Dynamic microphones might not capture the full frequency range of brass instruments, while condenser mics, particularly large diaphragm ones, are often more effective for their sensitivity and ability to capture nuanced details.
- Neglecting to Test Levels: Musicians frequently forget to check and adjust the input levels before starting the recording. If the levels are too high, it can lead to clipping and distortion, while levels that are too low can result in a weak and noisy recording, making it crucial to test and set appropriate levels in advance.
- Failing to Monitor Sound: Many musicians do not use headphones to monitor their sound while recording, which can lead to missed issues such as distortion or background noise. Monitoring allows musicians to hear exactly what the microphone is capturing in real-time, enabling them to make necessary adjustments to achieve a better recording.
How Can You Improve Your Horn Recording Setup?
Improving your horn recording setup involves selecting the right microphone and optimizing your recording environment.
- Dynamic Microphones: Dynamic microphones are robust and can handle high sound pressure levels, making them ideal for loud instruments like horns. They typically have a focused pickup pattern, which helps isolate the sound of the horn from background noise.
- Condenser Microphones: Condenser microphones are known for their sensitivity and broad frequency response, capturing the nuances of a horn’s tone with clarity. They generally require phantom power, but their ability to pick up subtle details makes them a favorite for studio recordings.
- Ribbon Microphones: Ribbon microphones provide a warm, vintage sound that can enhance the natural timbre of horns. Their figure-8 pickup pattern allows for capturing sound from both the front and back, which can be useful in certain recording setups.
- Microphone Placement: The placement of the microphone relative to the horn significantly affects the recording quality. Experimenting with distance and angles can help achieve the desired sound, as closer placements may emphasize higher frequencies while farther placements can result in a more balanced tone.
- Acoustic Treatment: Improving the recording environment through acoustic treatment can greatly enhance the quality of horn recordings. Using bass traps, diffusers, and absorptive materials can minimize reflections and create a more controlled sound field.
- Preamp Quality: The quality of the microphone preamp can influence the overall sound of your recordings. Investing in a high-quality preamp can improve the clarity and warmth of the recorded horn sound, making it more professional.
- Recording Software and Plugins: Utilizing advanced recording software and plugins can enhance the post-production process. Effects like EQ, compression, and reverb can shape the final sound of the horn recording, allowing for greater creative control.