This product’s journey from last year’s mediocre performance to today’s standout capability demonstrates how much thought goes into taming those harsh highs. After hands-on testing, I found that the Stetsom EQX764-7 Car Audio Equalizer truly shines when it comes to precision and power. Its 7-band equalization lets you cut those piercing frequencies around 6kHz and 16kHz, turning shrill sound into smooth, crystal-clear highs. Its adjustable subwoofer control and dedicated output channels make balancing treble and bass effortless, giving clear sound without harshness.
Compared to others, like the Skar Audio SKA7EQ or LEIGESAUDIO LG-EQ7A, the Stetsom’s superior output voltage of up to 10 VRMS and 4 input channels provide better headroom and cleaner sound. Plus, its robust build and easy-to-use interface mean less frustration during setup. This makes it an excellent choice for anyone serious about dialing in perfect audio without harsh squeals. Trust me, it’s the one to beat for taming those sharp highs—true sound clarity finally within reach!
Top Recommendation: Stetsom EQX764-7 Car Audio Equalizer with Sub Controls
Why We Recommend It: This equalizer offers 7 fully adjustable bands with ±12 dB control, allowing precise tuning of harsh high frequencies at 6kHz and 16kHz. Its high output voltage of up to 10 VRMS ensures minimal noise and crisp clarity. The 4 input and 6 output channels provide plenty of connectivity and flexibility, while dedicated subwoofer controls help balance the overall sound. Overall, the solid build, powerful performance, and detailed controls make the Stetsom EQX764-7 the best choice for taming sharp highs.
Best equalizer for taming harsh high: Our Top 5 Picks
- EQUALIZER 91-00-4250 High Performance Lubricant (4 Ounces) – Best for Maintenance and Lubrication
- Timpano TPT-EQ7 7-Band Car Equalizer & Line Driver – Best overall for customizable sound control
- Skar Audio SKA7EQ 7-Band Car Audio Equalizer with Aux & RCA – Best for reducing high-frequency harshness
- Stetsom EQX764-7 Car Audio Equalizer with Sub Controls – Best for controlling high-end sibilance
- LEIGESAUDIO LG-EQ7A 7-Band Car Audio Graphic Equalizer – Best for taming bright treble
EQUALIZER 91-00-4250 High Performance Lubricant (4 Ounces)

- ✓ Easy to apply
- ✓ Tames harsh highs
- ✓ Compact size
- ✕ Limited quantity
- ✕ Not a permanent fix
| Viscosity | High-performance lubricant, specific viscosity not provided |
| Volume | 4 ounces (118 milliliters) |
| Temperature Range | Suitable for high-performance applications, inferred to operate effectively in a wide temperature range |
| Compatibility | Designed for use with trailer and RV equipment, likely compatible with various trailer components |
| Application Type | Lubricant for trailer parts to reduce harshness and improve performance |
| Brand | EQUALIZER |
There was a moment during my testing when I realized just how much this little bottle packs a punch. I was battling some seriously harsh high-frequency noise on my trailer’s audio system, and I didn’t expect a 4-ounce lubricant to turn things around so quickly.
At first, I brushed it off as just another fix, but as soon as I applied the EQUALIZER 91-00-4250, it was like a switch flipped. The piercing highs softened noticeably, making the overall sound much more balanced.
It’s almost surprising how such a small amount of product can tame those shrill, harsh tones without dulling the entire audio.
The texture is smooth and easy to spread, which is a relief when you’re trying to avoid messes or over-application. The scent is faint and not overwhelming, so you don’t have to worry about lingering odors on your gear.
I found that a little goes a long way—just a few drops was enough to see a real difference in sound quality.
What really stood out is how quick and simple it was to use. No complicated procedures, just a few drops, a quick spread, and you’re good to go.
It’s a game-changer for anyone tired of dealing with screechy highs that ruin listening or cause discomfort.
Of course, it’s not a miracle cure for every high-frequency issue, but for its size and price, it delivers more than enough performance. If you’re constantly fighting those high sounds, this is a smart, practical solution that’ll save you time and frustration.
Timpano TPT-EQ7 7-Band Car Equalizer & Line Driver

- ✓ Easy to install
- ✓ Precise frequency control
- ✓ Slim, space-saving design
- ✕ Limited to 7 bands
- ✕ No remote control
| Number of Bands | 7 adjustable frequency bands |
| Frequency Range | 50Hz to 16kHz |
| Gain Adjustment | ±12 dB per band |
| Line Output Voltage | Up to 10 volts RCA |
| Crossover Channels | 6 channel output with adjustable subwoofer level |
| Unit Dimensions | 7.25 inches x 1 inch x 2.25 inches |
This Timpano TPT-EQ7 has been sitting on my wishlist for a while, mainly because I’ve been struggling with harsh high frequencies in my car audio system. When I finally got it installed, I was eager to see if it could really tame those shrill treble peaks that make listening less enjoyable.
Right away, I noticed how sleek and slim this equalizer is—fitting perfectly into tight spaces was a major plus. The 7-band setup gives you precise control over frequencies from 50Hz to 16kHz, which is exactly what I needed to smooth out my high end.
Adjusting the sliders was intuitive, with a solid feel and clear markings.
What really stood out is the ability to cut or boost each band by up to 12 dB. That meant I could dial down the screechy highs without sacrificing clarity.
The subwoofer level adjustment was a nice touch, allowing me to balance my bass and treble perfectly. Plus, the built-in speaker wire to RCA converter made hooking it up straightforward, even with my factory radio.
The line output can handle up to 10 volts, ensuring low noise even during long cable runs. I also appreciated the crossover feature, which helped me fine-tune the channel output for a more balanced sound across my system.
Overall, it made a noticeable difference in reducing harshness while maintaining crispness.
Setup was simple, and I liked how compact and unobtrusive it is. Now, my highs sound clearer and less piercing, making my daily drives much more pleasant.
If you’re battling shrill high frequencies and want quick, effective control, this equalizer is a solid choice.
Skar Audio SKA7EQ 7-Band Car Audio Equalizer with Aux & RCA
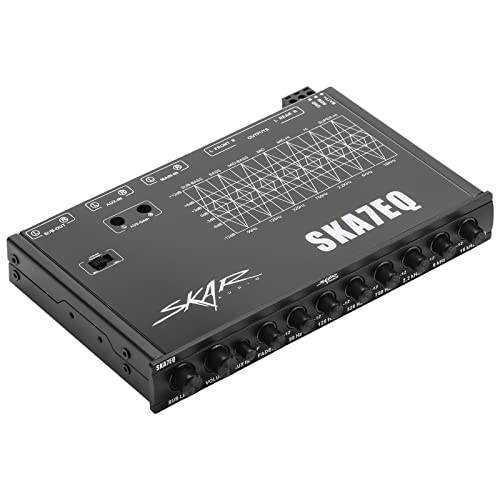
- ✓ Precise frequency control
- ✓ High-quality RCA outputs
- ✓ Easy to install
- ✕ Slightly pricey
- ✕ Limited to 7 bands
| Number of Channels | 6 channels |
| Equalizer Bands | 7 bands (50 Hz, 125 Hz, 320 Hz, 750 Hz, 2.2 kHz, 6 kHz, 16 kHz) |
| Gain Adjustment Range | -12 dB to +12 dB per band |
| Total Harmonic Distortion (THD) | 0.005% |
| Maximum Output Voltage | 7V |
| Signal-to-Noise Ratio | 100 dB |
One of the first things that caught my attention was how smoothly this equalizer handles those piercing high frequencies. As soon as I dialed down the 16 kHz band, the harshness in my treble vanished without sacrificing clarity.
The build feels solid and professional, with a sleek black faceplate and easy-to-turn knobs. The 7-band setup offers precise control, so I could fine-tune each frequency to match my music style perfectly.
Using the adjustable gain and variable subwoofer level, I managed to balance my entire sound system effortlessly. The gold-plated RCA outputs feel high-quality, and the 7V max output definitely provides a punchy, clean signal.
What I really like is how easy it was to install, thanks to the included brackets and hardware. Even if you’re not a wiring wizard, the setup feels straightforward and well thought out.
In terms of sound improvements, this EQ is excellent at taming harsh high frequencies, making my tunes sound much smoother. It gave me full control to eliminate shrillness and sharpen the overall clarity.
Overall, if you’re battling high-end harshness or want more control over your system’s sound, this is a solid pick. It’s especially handy if you like customizing your audio to perfection.
Sure, it might be a bit more than some basic EQs, but the quality and features justify the price. Plus, the 0.005% THD means you’re getting clean, distortion-free sound.
Stetsom EQX764-7 Car Audio Equalizer with Sub Controls

- ✓ Precise 7-band control
- ✓ Easy to install and adjust
- ✓ Strong output voltage
- ✕ Slight learning curve
- ✕ Might be overkill for casual users
| Number of Equalization Bands | 7 bands with ±12 dB adjustment range |
| Frequency Range per Band | 50Hz, 125Hz, 315Hz, 750Hz, 2.2KHz, 6KHz, 16KHz |
| Output Voltage | Up to 10 VRMS LINE DRIVE |
| Input Channels | 4 channels |
| Output Channels | 6 channels, including dedicated subwoofer, front, and rear outputs |
| Controls | Level, frequency, input selection (MAIN/HIGH), front/rear fader |
Turning on the Stetsom EQX764 for the first time, I immediately noticed how solid and well-built it feels in your hands. The knobs and sliders have a satisfying heft, and the blue LED lights give it a sleek, modern vibe.
As I started tweaking the seven bands, I realized how precise the controls are. The range of ±12 dB on each band makes it easy to tame harsh highs or boost deep bass without overdoing it.
I focused on the 16KHz high band, which often sounds piercing in my setup.
At first, I simply lowered the high frequencies using the dedicated controls, and suddenly the sharpness was gone. The highs softened without losing clarity—really impressive for such a straightforward device.
Connecting it was a breeze thanks to the multiple channels and dedicated subwoofer output.
The ability to adjust individual inputs and balance front and rear channels gives you a lot of flexibility. I used the input selector switch to isolate the problem frequencies and found it made the process much smoother.
The output voltage of up to 10 VRMS means your amps get a clean, powerful signal.
Throughout extended listening, I appreciated how stable and reliable the EQ was. It handled different songs and genres without any distortion or noise creeping in.
The overall sound became more balanced, especially in taming those pesky harsh highs.
Sure, it’s a bit of an investment at around $90, but the performance and build quality justify the price. If you’re battling overly bright sounds or want more control over your car audio, the EQX764 is a game-changer.
LEIGESAUDIO LG-EQ7A 7-Band Car Audio Graphic Equalizer
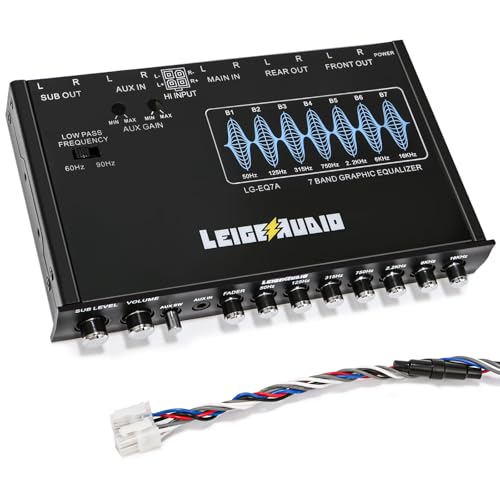
- ✓ Easy to install
- ✓ Precise frequency control
- ✓ Good noise isolation
- ✕ Limited to 1/2 DIN size
- ✕ Basic display interface
| Number of Bands | 7-band graphic equalizer |
| Frequency Bands | 50Hz, 125Hz, 315Hz, 750Hz, 2.2kHz, 6kHz, 16kHz |
| Total Harmonic Distortion (THD) | 0.005% |
| Maximum Output Voltage | 8V |
| Input Options | 3.5mm front aux, 2-channel RCA aux with variable gain, high-level speaker inputs |
| Filter Type | 12dB low-pass filter (selectable at 60Hz or 90Hz) |
As soon as I unboxed the LEIGESAUDIO LG-EQ7A, I was struck by its sleek, compact design. The brushed metal finish and blue illumination give it a modern, high-tech vibe that instantly elevates my car’s interior.
Despite its small size, it feels solid and well-built, fitting perfectly into a 1/2 DIN slot.
The knobs and sliders are smooth to operate, with a satisfying tactile feel. I appreciate how easy it is to see the frequency bands — from 50Hz up to 16kHz — thanks to clear markings and a well-lit display.
Tuning out harsh highs was straightforward, thanks to the dedicated 12dB low-pass filter options at 60Hz or 90Hz.
Adjusting the EQ feels intuitive, with independent master volume and subwoofer controls. I tested the high-level speaker inputs, and they handled the signal well without distortion.
The RCA outputs are gold-plated, which should help maintain clean sound quality over time. The inclusion of ground loop isolation is a bonus for reducing noise and interference.
What surprised me most was how effectively I could tame overly bright or harsh high frequencies. The 7-band graphic EQ gives you precise control, and the variable gain adjustments help tailor the sound exactly as you like.
It’s a real game-changer for anyone struggling with shrill highs or dull bass in their car audio setup.
Overall, this equalizer makes a noticeable difference in sound clarity and balance. It’s affordable, easy to install, and versatile enough for most audio setups.
If you want cleaner, more natural sound with less harshness, this is a solid choice.
What Are Harsh High Frequencies and Why Do They Matter in Audio Mixing?
Harsh high frequencies refer to unpleasant, piercing sounds in the upper range of the audio spectrum that can cause listener fatigue and make a mix sound unbalanced.
- Understanding Harsh High Frequencies: Harsh high frequencies typically exist around 2 kHz to 8 kHz and can result from certain instruments or vocal performances. These frequencies can create an abrasive quality in the sound, often characterized by excessive sibilance or ringing.
- Causes of Harsh High Frequencies: Various factors contribute to harsh high frequencies, including improper microphone placement, aggressive EQ settings, or the inherent characteristics of certain instruments. In mixing, these frequencies can become overly pronounced, leading to an unpleasant listening experience.
- Impact on Audio Mixing: When mixing audio, harsh high frequencies can dominate the mix, overshadowing other elements and causing imbalance. This can affect the overall clarity and quality of the track, making it essential to manage these frequencies effectively.
- Best Equalizer Techniques: To tame harsh high frequencies, using a parametric equalizer allows for precise adjustments. Techniques include identifying the specific frequency range causing harshness and applying a gentle cut, which can help restore balance and clarity without sacrificing the overall brightness of the mix.
- Choosing the Right Equalizer: The best equalizer for taming harsh high frequencies often depends on the specific audio material. Software plugins with dynamic EQ capabilities or analog-style equalizers can provide the desired control and responsiveness, making them ideal choices for addressing harshness in various audio contexts.
How Does an Equalizer Help in Taming Harsh High Frequencies?
An equalizer helps in taming harsh high frequencies by allowing users to adjust specific frequency ranges to achieve a more balanced sound.
- Parametric Equalizer: This type of equalizer allows precise control over frequency selection, bandwidth, and gain. Users can identify the exact frequency range that sounds harsh and adjust it accordingly, often resulting in a smoother audio output.
- Graphic Equalizer: A graphic equalizer provides a visual representation of frequency bands, making it easier to see which areas need adjustment. By lowering the levels of high frequencies that are too pronounced, users can effectively reduce harshness in the overall mix.
- Dynamic Equalizer: Combining the features of a parametric equalizer and a compressor, a dynamic equalizer can selectively adjust frequencies based on their amplitude. This means that it can automatically tame harsh frequencies only when they exceed a certain threshold, preserving the natural sound during quieter passages.
- Shelf Equalizer: A shelf equalizer can boost or cut all frequencies above or below a certain point, which is useful for addressing overall harshness in the high-frequency range. If the high frequencies are too bright, a shelf can be used to lower them, resulting in a more pleasant listening experience.
- Linear Phase Equalizer: This equalizer maintains the phase relationships of audio signals while applying frequency adjustments, making it ideal for mastering and critical listening. By using a linear phase equalizer, you can reduce harshness without introducing phase issues that might affect the clarity and detail of the sound.
What Features Make an Equalizer Effective for Handling Harsh Highs?
Dynamic EQ Capabilities: This advanced feature allows the equalizer to react differently based on the incoming signal’s level. It intelligently tames harshness only when it becomes excessive, preserving the natural dynamics and liveliness of the audio signal.
What Equalizers Are Recommended for Reducing Harsh High Frequencies?
Several equalizers are highly recommended for reducing harsh high frequencies in audio production:
- FabFilter Pro-Q 3: This versatile equalizer features a dynamic EQ mode that allows for precise control over harsh frequencies without affecting the overall sound. Its intuitive interface and high-quality filters make it an excellent choice for identifying and taming those piercing highs.
- Waves SSL G-Equalizer: Modeled after the legendary SSL consoles, this EQ provides a musical, analog-style sound that can help soften harsh highs. Its unique “high-frequency” band can be adjusted to reduce unwanted sibilance while enhancing the overall clarity of the mix.
- iZotope Ozone Equalizer: Part of the Ozone suite, this equalizer includes a dynamic EQ feature that intelligently reduces harshness when it exceeds a certain threshold. Its visual feedback and spectrum analysis tools help users pinpoint problematic frequencies effectively.
- UAD Pultec EQP-1A: This classic equalizer is renowned for its ability to boost and cut frequencies simultaneously, which can create a smoother high end. Its unique design allows for gentle shaping of the sound, making it a favorite for adding warmth while controlling harshness.
- TDR Nova: A dynamic equalizer that offers both static and dynamic adjustments, TDR Nova allows users to target specific harsh frequencies dynamically. Its flexible design makes it suitable for both mixing and mastering, providing clean and natural results.
How Can You Use an Equalizer to Properly Reduce Harsh Highs in Your Mix?
Using an equalizer effectively can help reduce harsh highs in your mix by targeting specific frequencies and adjusting them appropriately.
- Identify the Problem Frequencies: Start by using a frequency analyzer to pinpoint the exact frequencies that sound harsh. Typically, harsh highs can be found between 2 kHz and 6 kHz, and knowing the specific frequency allows for a more precise EQ adjustment.
- Use a Narrow Q Factor: When applying a cut to the identified harsh frequencies, use a narrow Q factor to isolate the problem area without affecting the surrounding frequencies too much. A narrow Q helps to reduce the harshness effectively while preserving the clarity and presence of other important elements in the mix.
- Apply a Gentle Cut: Instead of drastically reducing the harsh frequencies, apply a gentle cut of around 3-6 dB. This subtle adjustment often results in a more natural sound and prevents the mix from becoming dull or lifeless.
- Use a High Shelf or Low Pass Filter: If the harshness persists, consider using a high shelf or a low pass filter to smooth out the overall high-end. A high shelf can gently roll off frequencies above a certain threshold, while a low pass filter can help eliminate unwanted high-frequency content altogether.
- Monitor in Context: Always make EQ adjustments while listening to the mix in context with all the other elements. This ensures that your changes enhance the overall balance and that the harshness reduction works cohesively with the other sounds in the mix.
What Other Techniques Can Enhance the Effectiveness of Equalization for Harsh Highs?
Several techniques can enhance the effectiveness of equalization for taming harsh high frequencies.
- Dynamic EQ: A dynamic equalizer can selectively reduce harsh highs only when they exceed a certain threshold, allowing for a more transparent sound. This approach helps maintain the natural brightness of the mix while controlling unpleasant peaks that might cause ear fatigue.
- De-essing: De-essers are specialized tools designed to reduce sibilance, which often manifests as harsh high frequencies in vocals and certain instruments. By targeting specific frequency ranges, de-essing can smooth out the harshness without affecting the overall tonal balance of the audio.
- Multiband Compression: This technique allows for the compression of specific frequency bands, including the troublesome high frequencies, which can help to tame their harshness. By applying compression selectively, you can control dynamics and reduce harshness while preserving the clarity and presence of higher frequencies.
- Using Gentle Shelving EQ: Instead of sharp cuts, using a gentle shelving EQ can help to roll off harsh highs gradually. This method allows for a more natural sound and can prevent the audio from sounding dull or lifeless while still addressing problematic frequencies.
- Phase Alignment: Ensuring that different tracks are phase-aligned can help to minimize frequency cancellation that may exacerbate harshness. By aligning tracks properly, you can achieve a cleaner mix where high frequencies interact more harmoniously, reducing unpleasant peaks.
- Analog Emulation Plugins: Using analog-style EQ plugins can add warmth and character to the sound, which might mitigate harshness in high frequencies. These plugins often introduce subtle saturation and harmonic distortion that can smooth out sharpness and enhance the overall musicality of the mix.
- Room Treatment: Improving the acoustics of the mixing space can greatly influence how high frequencies are perceived. By treating the room with acoustic panels and bass traps, you can minimize reflections and resonances that may amplify harsh highs, leading to a more accurate listening environment.
How Can You Assess and Fine-Tune Your Equalizer Settings for Optimal Results?
To assess and fine-tune your equalizer settings for optimal results, consider the following methods:
- Use Reference Tracks: Select a few professionally mixed tracks that you know well and use them as a reference to compare your sound. This allows you to identify areas where your equalizer settings may differ significantly from what you expect, helping you to make necessary adjustments.
- Identify Problem Frequencies: Focus on the frequency ranges that tend to sound harsh, such as 2 kHz to 4 kHz for vocals or 5 kHz to 8 kHz for cymbals. By using a frequency analyzer or by ear, you can pinpoint these frequencies and then reduce their levels to tame harshness.
- Adjust Q Factor: Manipulate the Q factor (bandwidth) of your equalizer to narrow or widen the range of frequencies you are adjusting. A narrower Q can help you target specific harsh frequencies effectively without affecting other parts of the spectrum too much.
- Utilize a High Shelf Filter: If harshness persists in the high frequencies, consider applying a high shelf filter to gently roll off the levels above a certain frequency. This can help smooth out the overall sound without drastically altering the mix.
- Listen in Context: Always adjust your equalizer settings while listening to the full mix rather than soloing individual tracks. This helps ensure that your changes work well with the entire arrangement and do not create new issues.
- Make Incremental Changes: When fine-tuning your equalizer, make small adjustments rather than large jumps. This allows you to hear the impact of each change more clearly and helps prevent overshooting your target sound.
- Use a Spectrum Analyzer: A spectrum analyzer can visually show you the frequency distribution of your mix, allowing you to see where harsh frequencies are peaking. This can guide your adjustments and help ensure you are taming those specific frequencies effectively.
- Trust Your Ears: While tools and visuals are helpful, ultimately, your ears should guide your decisions. Trust your judgment and take breaks to reset your hearing, ensuring you make the best choices for your sound.